Content Objective
Students will learn about the expressive qualities of color in their paintings
Students will discuss the successful use of color in selected artworks and will choose one to paint Students will identify artworks in which the element of color is emphasized Students will use prior knowledge of the painting process in creating tints and shades for realism in painting. Students will create their own masters painting |
Language Objectives
1. Listen to and watch as teacher demonstrates the technique of sketching and painting a masters painting.
3. Clearly articulate the art of tinting and shading hues by using the proper vocabulary. 4. Comprehend and make a connection between tinting and shading hues and making an object appear realistic 5 Students will summarize their piece by writing a sentence that best describes their piece. |
Vocabulary
Primary Colors:
red, yellow, or blue light, from which all other colors are created Secondary Colors: Orange, Violet, Green. Each color is midway between the Primaries from which it can be mixed. Tinting: Tint is the opposite of shade. Tinting is combining white with a color to make it lighter. Shading: Using a mixture of black mixed with a color to make it darker. The opposite of shade is tint. Hue: Another name for the word "color" |
Materials
9x12' White drawing paper
Ruler to border your paper Pencil Paint Brush Pallet Water Sharpie marker (black) Scissors to cut border Construction paper to frame your completed work |
Activity:
Students will:
1. Choose a masters painting. They will then border a white piece of 9x12 drawing paper.
2. Sketch lightly as you refer to painting. Do not shade in anything. This is your prep for painting.
3. When you are ready to paint, place newspaper on your table and get water, paint, pallet, brush and a small piece of paper towel to dry brush.
4. Paint your masters painting, using your color wheel as reference for color tints and shades.
5. All wet paintings must be placed on the dry rack. Be sure that your name, grade and block are on your paper.
6. Upon completion of your painting you will cut off border and glue colored construction under your painting to frame your piece.
|
|
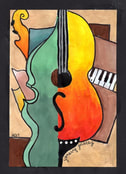
Yenevy 2017
|
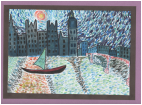
Mirna
|